Shop

Saturday, October 29, 2022

Stampin' Up! All Bundled Up ~ Birthday Card


I created this card for Try Stampin' On Tuesday's Challenge 580.  (This challenge doesn't end until November 6th, so there's still time to enter ~ the more the merrier!)  The optional them for this challenge is 'flight', so I'm just imagining that the moose's hat is an aviator hat.  That's a thing, right?  Or, the balloon is taking flight!  lol 


The sentiment, which is heat embossed with white embossing powder, is from Celebrate with Tags stamp set.  After heat embossing, I used Stitched Rectangle Dies to cut it out.  I prefer to stamp, then die cut when possible.  For me, it's easier to get my stamped images straight and centered this way. 
The balloon was die cut with Celebrations Tag Dies from In Color Glimmer Paper.  I love the fun element that the sparkly balloon adds!


Inside the card, I stamped another sentiment from Celebrate with Tags and also stamped the balloon.  Just a quick way to brighten up the inside of a the card. 


MEASUREMENTS
Card Base ~ Orchid Oasis Cardstock ~ 11" x 4-1/4", score at 5-1/2"
Layer 1 ~ 2022-2024 In color DSP ~ 4" x 5-1/4"
Layer 2 ~ Basic White Cardstock ~ 3-1/4" x 4"
Layer 3 ~ Starry Sky Cardstock ~ 2-3/4" x 1-1/2"
scrap of In Color Glimmer Paper


Happy Stamping!


 I sent out my FOURTH 12 Weeks of Christmas Project Tutorial to all my mailing list subscribers yesterday!

What is this?  It's an email I will be sending out every Friday between now and Christmas 
(only 8 weeks away!)
that will contain a Christmas Project Tutorial.  
The tutorial might be anything from a card, to a gift box, small gift idea, to a tag!  

Sign up before Friday, November 4th, to get the remaining 8 tutorials.  
This is just my way saying thank you for being part of my emailing list!
(When you sign up for my mailing list, you are also agreeing to get my newsletter...you can unsubscribe at any time)

PRODUCT LIST
Click on any of the photos below to go straight to that item in my online store.
During the month of October 2022, please use Host Code MUDDWE9T on orders under $150.  
Thank you!

Friday, October 28, 2022

Stampin' Up! All Bundled Up ~ Three Cute Cards


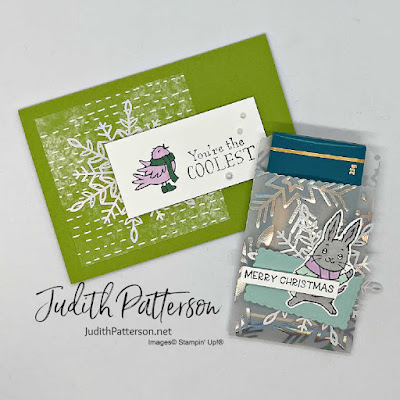
These three cards, featuring Stampin' Up!'s All Bundled Up stamp set, are really very easy to make.  They do take a little bit of extra time, just due to all the coloring...which can be quite relaxing, if you like to color! I love the assortment of colors that comes in Stampin' Up!'s Watercolor Pencils.  For these cards, I only used Assortment 1, but you can also use Assortment 2 for even more colors!


MEASUREMENTS
Card Base ~ Old Olive Cardstock ~ 11" x 4-1/4", score at 5-1/2"
Layer 1 ~ Old Olive Cardstock ~ 5-1/4" x 4"
Layer 2 ~ Pool Party Cardstock ~ 3-1/2" x 4-3/4"
Layer 3 ~ Shimmery White Cardstock ~ 2-5/8" x 3-7/8"
Sentiment ~ Poppy Parade Cardstock ~ approx. 1/2" x 3-1/2"


MEASUREMENTS
Card Base ~ Polished Pink Cardstock ~ 8-1/2" x 5-1/2", score at 4-1/4"
Layer 1 ~ Pacific Point Cardstock ~ 4-3/4" x 3-1/2"
Layer 2 ~ Celebrate Everything DSP ~ 4-1/2" x 3-1/4"
Layer 3 ~ Basic White Cardstock ~ 2" x 3-1/4"
Layer 4 ~ Shimmery White Cardstock ~ 2-1/4" x 2-1/2"


MEASUREMENTS
Card Base ~ Pacific Point Cardstock ~ 11" x 4-1/4", score at 5-1/2"
Layer 1 ~ Snowflake Specialty Vellum ~ 5-1/4" x 4"
Layer 2 ~ Shimmery White Cardstock ~ 3-1/2" x 4-3/4"
Sentiment Piece ~ Poppy Parade Cardstock ~ approx. 1/2" x 3-3/4"

ALL inside layers for these cards are
Basic White Cardstock ~ 4" x 5-1/4"


Would you like the cardstock pieces (and enough sequins) to make these three cards at home?  
The first three people who place an order with me and either include the All Bundled Up stamp set in their order, OR, contact and let me know that want the All Bundled Up card pieces will receive these in the mail.  

You can watch my YouTube tutorial for these three cards below

Happy Stamping!


 I sent out my FOURTH 12 Weeks of Christmas Project Tutorial to all my mailing list subscribers this morning!  

What is this?  It's an email I will be sending out every Friday between now and Christmas 
(only 8 weeks away!)
that will contain a Christmas Project Tutorial.  
The tutorial might be anything from a card, to a gift box, small gift idea, to a tag!  

Sign up before Friday, November 4th, to get the remaining 8 tutorials.  
This is just my way saying thank you for being part of my emailing list!
(When you sign up for my mailing list, you are also agreeing to get my newsletter...you can unsubscribe at any time)

PRODUCT LIST
Click on any of the photos below to go straight to that item in my online store.
During the month of October 2022, please use Host Code MUDDWE9T on orders under $150.  
Thank you!

Thursday, October 27, 2022

Stampin' Up! All Bundled Up ~ Ink & Inspiration Blog Hop


 Hey Stampers & Friends!  Welcome to the Ink & Inspiration Blog Hop.  I'm excited to be part of this fun and creative group sharing stamping ideas with you today!


This month's color & inspiration challenges come from the photo below.  This picture is full of such rich fall colors, I love it!  I didn't think I would be able to work it all into a card with my stamp set of the week, All Bundled Up, but surprisingly I did.  I've always said sketch challenges are my favorite, but I'm really starting to love these photo/color combos.  This type of challenge creates fun, unique and often beautiful cards!


The circle die (from Stylish Shapes Dies) that I wanted to use was not quite big enough for all of the raccoon's tail.  I didn't want to fussy cut the entire racoon this time, so I used a hobby knife (like an x-acto) to cut around the tail before die cutting the circle.  Since I already had the hobby knife out, I used it to cut around his little paw, too.  Then, I carefully slipped the sentiment under his paw so it looks like he is holding it. 


For the little bird on the front of the card I used the dark blends in Pumpkin Pie, Tahitian Tide and Crumb Cake.  For the bird inside the card, I used the light blends of these same colors.
The Light Pumpkin Pie was also used to color just a bit of the raccoons ears, then I went over it with Light Crumb Cake. 


MEASUREMENTS
Card Base ~ Basic Black Cardstock ~ 8-1/2" x 5-1/2". score at 4-1/4"
Layer 1 ~ Merry Merry Merlot Cardstock ~ 5-1/8" x 3-7/8"
Layer 2 ~ Rustic Harvest DSP ~ 5" x 3-3/4"
Layer 3 ~ Rustic Harvest DSP ~ 3/4" x 5"
Layer 4 (for circle) ~ Mossy Meadow Cardstock ~ 2-3/4" x 2-3/4"
Layer 5 (for circle) ~ Basic White Cardstock ~ 3" x 3"
Layer 6 (sentiment) ~ Merry merlot Cardstock ~ 3/4" x 3-1/4"
Scrap of Basic White for Bird 
Inside Layer ~ Basic White Cardstock ~ 4" x 5-1/4"


Happy Stamping! 

Follow the links below to visit all the other blogs in this blog hop for even stamping inspiration.

BLOG HOP LIST


 I sent out my third 12 Weeks of Christmas Project Tutorial to all my mailing list subscribers last Friday!  

What is this?  It's an email I will be sending out every Friday between now and Christmas 
(only 9 weeks away!)
that will contain a Christmas Project Tutorial.  
The tutorial might be anything from a card, to a gift box, to a tag!  

Sign up before this Friday, October 28th, to get the remaining 9 tutorials.  
This is just my way saying thank you for being part of my emailing list!
(When you sign up for my mailing list, you are also agreeing to get my newsletter...you can unsubscribe at any time)

PRODUCT LIST
Click on any of the photos below to go straight to that item in my online store.
During the month of October 2022, please use Host Code MUDDWE9T on orders under $150.  
Thank you!

Wednesday, October 26, 2022

Stampin' Up! All Bundled Up ~ Christmas Card


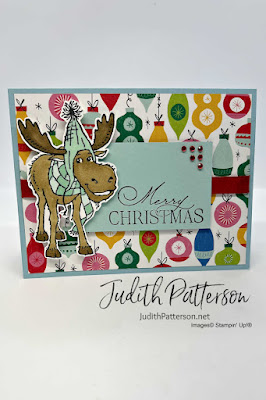
 Today's fun Christmas card, featuring Stampin' Up!'s All Bundled Up stamp set, was inspired by Sketch Challenge PP614 from the Paper Players.  This is another great sketch that has endless possibilities! 

One of the best things about sketches is that they are just a starting point, you can adjust them as you like. 


I colored this happy moose with Soft Suede Stampin' Blends and Pool Party Stampin' Blends.  I love that for most images you really don't need a lot of Stampin' Blends colors to color beautifully.  Just add and combine the light and dark blends in different ways to make subtly different colors. 


Can you spot my oops in the card above?  I accidentally grabbed a Balmy Blue Card Base instead of Pool Party.  OOPS!  I didn't realize it until I was editing this picture...is it super obvious? 

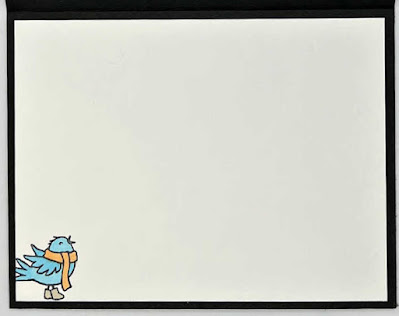
I couldn't resist adding another bird & sentiment inside the card.  I used my Light Pool Party Stampin' Blend and Light Soft Suede Stampin' Blend.   


MEASUREMENTS
Card Base ~ Pool Party Cardstock ~ 8-1/2" x 5-1/2", score at 4-1/4"
Layer 1 ~ Celebrate Everything (Host) DSP ~ 4" x 5-1/4"
Layer 2 ~ Pool Party Cardstock ~ 3-1/4" x 2"
Large scrap of Basic White for the moose
Inside Layer ~ Basic White Cardstock ~ 4" x 5-1/4"


Happy Stamping! 


 I sent out my third 12 Weeks of Christmas Project Tutorial to all my mailing list subscribers last Friday!  

What is this?  It's an email I will be sending out every Friday between now and Christmas 
(only 9 weeks away!)
that will contain a Christmas Project Tutorial.  
The tutorial might be anything from a card, to a gift box, to a tag!  

Sign up before this Friday, October 28th, to get the remaining 9 tutorials.  
This is just my way saying thank you for being part of my emailing list!
(When you sign up for my mailing list, you are also agreeing to get my newsletter...you can unsubscribe at any time)

PRODUCT LIST
Click on any of the photos below to go straight to that item in my online store.
During the month of October 2022, please use Host Code MUDDWE9T on orders under $150.  
Thank you!

Tuesday, October 25, 2022

Stampin' Up! All Bundled Up ~ Card from the Catalog


Stampin' Up!'s All Bundled Up is my Stamp Set of the Week this last full week of October.  This set can be found on p.45 of the 2022 July-December Mini Catalog.  Don't these animals look warm and cozy all bundled up for winter?!?


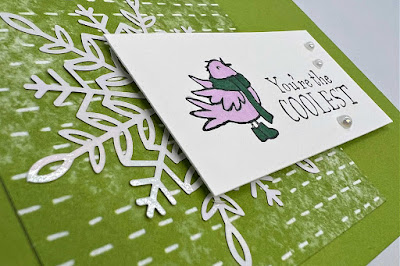
I'm not only sharing a card from the catalog today, but also an easy project from the catalog.  The card is exactly like it's found in the catalog, with the addition of a few Iridescent Basic Pearls.  

MEASUREMENTS
Card Base ~ Granny Apple Green Cardstock ~ 5" x 7", score at 3-1/2"
Layer 1 ~ Celebrate Everything DSP ~ 3" x 3"
Layer 2 ~ Wonderful Snowflake
Layer 3 ~ Basic White Cardstock ~ 1-1/2" x 3"
Inside Layer 1 ~ Basic White Cardstock ~ 4-3/4" x 3-1/4"
Inside Layer 2 ~ Celebrate Everything DSP ~ 1/2" x 3-1/4"


The project is slightly altered from the original in the catalog so I could use All Bundled Up stamps.  Since the sentiments are all a little long in this stamp set, I used 'Merry Christmas' from Framed & Festive stamps.  The Framed & Festive stamp set is only available to Stampin' Up! Demonstrators through October.  It will be available to everyone else, along with the rest of the Fitting Florets Collection, November 1st, while supplies last.  

MEASUREMENTS
Mini Pocket Envelope ~ Snowflake Specialty Vellum ~ 4-1/2" x 6"
Layer 1 ~ Wonderful Snowflake
Layer 2 ~ Pool Party Cardstock ~ 1-1/4" x 2-1/4"
Scraps of Basic White


To see how to put this little notecard and mini pocket envelope together and learn some of my tips, watch my YouTube Tutorial below.  

Happy Stamping! 


 I sent out my third 12 Weeks of Christmas Project Tutorial to all my mailing list subscribers last Friday!  

What is this?  It's an email I will be sending out every Friday between now and Christmas 
(only 9 weeks away!)
that will contain a Christmas Project Tutorial.  
The tutorial might be anything from a card, to a gift box, to a tag!  

Sign up before this Friday, October 28th, to get the remaining 9 tutorials.  
This is just my way saying thank you for being part of my emailing list!
(When you sign up for my mailing list, you are also agreeing to get my newsletter...you can unsubscribe at any time)

PRODUCT LIST
Click on any of the photos below to go straight to that item in my online store.
During the month of October 2022, please use Host Code MUDDWE9T on orders under $150.  
Thank you!

Saturday, October 22, 2022

Stampin' Up! Cup of Tea ~ Sketch Saturday


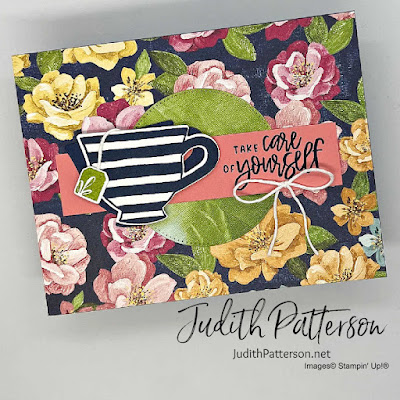
Today's card was inspired by Sketch Saturday's Sketch #712!  This is yet another sketch with endless possibilities!  This challenge will be running for two weeks, so you have plenty of time to join the fun!  


Cup of Tea stamps by Stampin' Up! are perfectly paired with Hues of Happiness Designer Series Paper for beautiful cards.  I love all of the sentiments in this set and the tea cups are perfect, especially with the little tea bag tag hanging out. 


MEASUREMENTS
Card Base ~ Night of Navy Cardstock ~ 8-1/2" x 5-1/2", score at 4-1/4"
Layer 1 ~ Hues of Happiness DSP ~ 4-1/4" x 5-1/2"
Layer 2 (circle) ~ Hues of Happiness DSP ~ 2-3/4" x 2-3/4"
Layer 3 ~ Flirty Flamingo Cardstock ~ 1" x 4-1/2"
Teacup 1 ~ Night of Navy Cardstock ~ 2" x 2-1/2"
Teacup 2 ~ Basic White Cardstock ~ 2" x 2-1/2"
Scrap of Basic White for the tea bag tag
Inside Layer 1 ~ Basic White Cardstock ~ 4" x 5-1/4"
Inside Layer 2 ~ Hues of Happiness DSP ~ 1/2" x 5-1/4"


Happy Stamping! 


 I sent out my third 12 Weeks of Christmas Project Tutorial to all my mailing list subscribers yesterday!  

What is this?  It's an email I will be sending out every Friday between now and Christmas 
(only 9 weeks away!)
that will contain a Christmas Project Tutorial.  
The tutorial might be anything from a card, to a gift box, to a tag!  

Sign up before next Friday, October 28th, to get the remaining 9 tutorials.  
This is just my way saying thank you for being part of my emailing list!
(When you sign up for my mailing list, you are also agreeing to get my newsletter...you can unsubscribe at any time)

PRODUCT LIST
Click on any of the photos below to go straight to that item in my online store.
During the month of October 2022, please use Host Code MUDDWE9T on orders under $150.  
Thank you!

Friday, October 21, 2022

Fun Fold Christmas Card


So, I messed up a little, but decided to go ahead and run with it and that's okay. 
This week's Stamp Set of the Week is Cup of Tea, but I finished this card and realized I never actually used those stamps.  However, I did use the coordinating Teacup Dies, and decided that's close enough this one time!

This beautiful Christmas card actually goes together really quickly and is perfectly displayed on  a mantle.  Keep reading for the measurements, YouTube tutorial, and supplies to make this card.


MEASUREMENTS
Card Base ~ Boughs of Holly DSP ~ 11-1/4" x 5-1/2", score at 4-1/4", 6", 7-3/4", 9-1/2"
Layer 1 ~ Brushed Metallic Cardstock ~ 3-1/2" x 7", score at 3-1/2"
Layer 2 ~ Boughs of Holly DSP ~ 3-1/4" x 3-1/4"
Layer 3 ~ Brushed Metallic Cardstock ~ 2-3/4" x 2-3/4"
for Teacup Die ~ Boughs of Holly DSP ~ 2" x 2-1/2"
sentiment ~ Evening Evergreen Cardstock ~ scrap at least 1" x 1-1/2"


Thank you for visiting my blog today!  Please let me know if I can help you on your stamping journey in any way. 

Watch my quick YouTube Tutorial for this card below

Happy Stamping! 


 I sent out my third 12 Weeks of Christmas Project Tutorial to all my mailing list subscribers this morning!  

What is this?  It's an email I will be sending out every Friday between now and Christmas 
(only 9 weeks away!)
that will contain a Christmas Project Tutorial.  
The tutorial might be anything from a card, to a gift box, to a tag!  

Sign up before next Friday, October 28th, to get the remaining 9 tutorials.  
This is just my way saying thank you for being part of my emailing list!
(When you sign up for my mailing list, you are also agreeing to get my newsletter...you can unsubscribe at any time)

PRODUCT LIST
Click on any of the photos below to go straight to that item in my online store.
During the month of October 2022, please use Host Code MUDDWE9T on orders under $150.  
Thank you!

Thursday, October 20, 2022

Stampin' Up! Cup of Tea Fun Fold Card


Stampin' Up!'s Cup of Tea stamp set is perfect for Fun Fold Cards! This one takes just minutes to put together, and could easily be altered by choosing a different pattern from the Tea Boutique Designer Series Paper and changing the Card Base color.  


I especially love the tiny tea bag tag to hang on the outside of the tea cup.  I attached this one with a small piece of Baker's Twine and Tear & Tape. 
Remember to only place adhesive behind the left side of the circle, so you don't end up gluing the entire thing shut.

For the inside of the card, add more DSP to the side panels, and a stamped tea cup to the center piece.


MEASUREMENTS
Card Base ~ Fresh Freesia Cardstock ~ 8-1/2" x 5-1/2", score at 2-1/8" and 6-3/8"
Front Panels ~ Tea Boutique DSP ~ 1-15/16" x 5-1/4" (*2)
 For Circle ~ Starry Sky Cardstock ~ 2-1/4" x 2-1/4"
For Tea Cup ~ Basic White Cardstock ~ 2" x 2-1/2"
Small Scrap of Basic White for the Tea Bag Tag

Inside Panels ~ Tea Boutique DSP ~ 1-15/16" x 5-1/4"
Inside ~ Basic White Cardstock ~ 4" x 5-1/4"


Thank you for visiting my blog today!  Please let me know if I can help you on your stamping journey in any way. 

Happy Stamping! 


 I sent out my second 12 Weeks of Christmas Project Tutorial to all my mailing list subscribers last Friday!  

What is this?  It's an email I will be sending out every Friday between now and Christmas 
(only 10 weeks away!)
that will contain a Christmas Project Tutorial.  
The tutorial might be anything from a card, to a gift box, to a tag!  

Sign up before next Friday, October 21st (tomorrow), to get the remaining 10 tutorials.  
This is just my way saying thank you for being part of my emailing list!
(When you sign up for my mailing list, you are also agreeing to get my newsletter...you can unsubscribe at any time)

PRODUCT LIST
Click on any of the photos below to go straight to that item in my online store.
During the month of October 2022, please use Host Code MUDDWE9T on orders under $150.  
Thank you!

Wednesday, October 19, 2022

Stampin' Up! Cup of Tea with Brightest Glow


How about a Cup of Tea for Christmas?  I'm finding that Stampin' Up!'s Cup of Tea stamps are perfectly paired with Brightest Glow sentiment stamps to make effortless Christmas cards.  


Stamp the first teacup with Evening Evergreen ink, then color in with Stampin' Blends in Evening Evergreen and Soft Succulent.  The 2nd teacup is die cut from Soft Succulent and Evening Evergreen Cardstocks.  


Thank you for visiting my blog today!  Please let me know if I can help you on your stamping journey in any way. 

Happy Stamping! 


 I sent out my second 12 Weeks of Christmas Project Tutorial to all my mailing list subscribers last Friday!  

What is this?  It's an email I will be sending out every Friday between now and Christmas 
(only 10 weeks away!)
that will contain a Christmas Project Tutorial.  
The tutorial might be anything from a card, to a gift box, to a tag!  

Sign up before next Friday, October 21st, to get the remaining 10 tutorials.  
This is just my way saying thank you for being part of my emailing list!
(When you sign up for my mailing list, you are also agreeing to get my newsletter...you can unsubscribe at any time)

PRODUCT LIST
Click on any of the photos below to go straight to that item in my online store.
During the month of October 2022, please use Host Code MUDDWE9T on orders under $150.  
Thank you!

Tuesday, October 18, 2022

Stampin' Up! Cup of Tea ~ TWO Cards from the Catalog


Stampin' Up!'s Cup of Tea Stamp Set, which is part of their Tea Boutique Suite, is so easy to make beautiful cards with that I decided to share not one, but TWO Cards from the Catalog with you today.  
I did make a slight change or two to each card, just to better suit my stamping style and the items I had on hand.  

The original versions of these cards can be found on p. 13 of the 2022-2023 Annual Catalog. 


This first card uses the Tea Boutique Cards & Envelopes which are super duper handy for making quick cards!  I did switch up the card base and envelope because I had already used the one shown in the catalog.  You do get four per color, but I had already used all of mine in the Starry Sky color, so I used Parakeet Party instead.  I love how it brightened up the card!


MEASUREMENTS
Card Base ~ Tea Boutique Cards & Envelopes ~ 5-1/2" x 8-1/2", score at 4-1/4"
Layer 1 ~ Basic White Cardstock ~ 4-1/2" x 3-1/4"
Layer 2 ~ Parakeet Party Cardstock ~ 2-1/2" x 2-1/4"
Scrap of Basic White
 

I think this 2nd card can come together even quicker than the first, if you don't get carried away stamping the background.  Bonus: This one can easily be adapted to not require any dies, if you don't yet have either of the Stampin' Cut & Emboss Machine. 

MEASUREMENTS
Card Base ~ Orchid Oasis Cardstock ~ 4-1/4" x 11", score at 5-1/2"
Layer 1 ~ Orchid Oasis Cardstock ~ 3-3/4" x 5-1/4"
Layer 2 ~ Tea Boutique DSP ~ 3-3/4" x 2"
Layer  3 ~ Basic White Cardstock ~ 2-1/4" x 4"
(This is more white CS than you need.) 


Now, it's your turn to enjoy CASEing these cards and making them your own!  

Here's my YouTube Tutorial for these cards.

Happy Stamping! 


 I sent out my second 12 Weeks of Christmas Project Tutorial to all my mailing list subscribers today!

What is this?  It's an email I will be sending out every Friday between now and Christmas 
(only 10 weeks away!)
that will contain a Christmas Project Tutorial.  
The tutorial might be anything from a card, to a gift box, to a tag!  

Sign up before next Friday, October 21st, to get the remaining 10 tutorials.  
This is just my way saying thank you for being part of my emailing list!
(When you sign up for my mailing list, you are also agreeing to get my newsletter...you can unsubscribe at any time)

PRODUCT LIST
Click on any of the photos below to go straight to that item in my online store.
During the month of October 2022, please use Host Code MUDDWE9T on orders under $150.  
Thank you!